Canary Mail makes it easy to organize your emails with Gmail labels on both Mac and iOS. You can attach multiple labels to individual messages, keeping everything organized. This guide will show you how to use Gmail labels in Canary Mail on iOS.
Viewing Labels
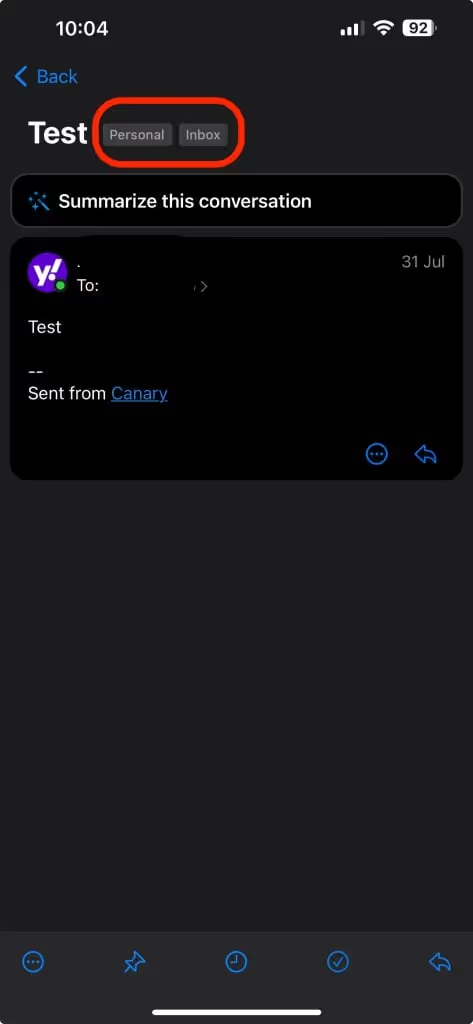
When you open an email in Canary Mail, you'll see the labels right at the top, just after the subject line. This makes it easy to quickly see how the email is categorized.
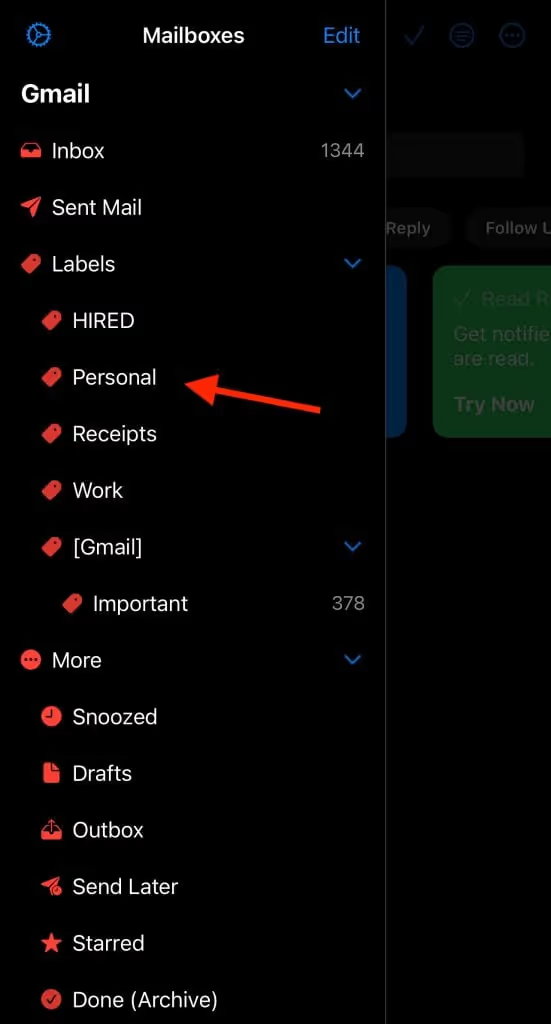
Keep in mind that labels in Canary Mail work like folders. For example, to view all emails with the "Personal" label, just click on the "Personal" label in the sidebar.
Creating New Labels
To create a new label in Canary Mail:
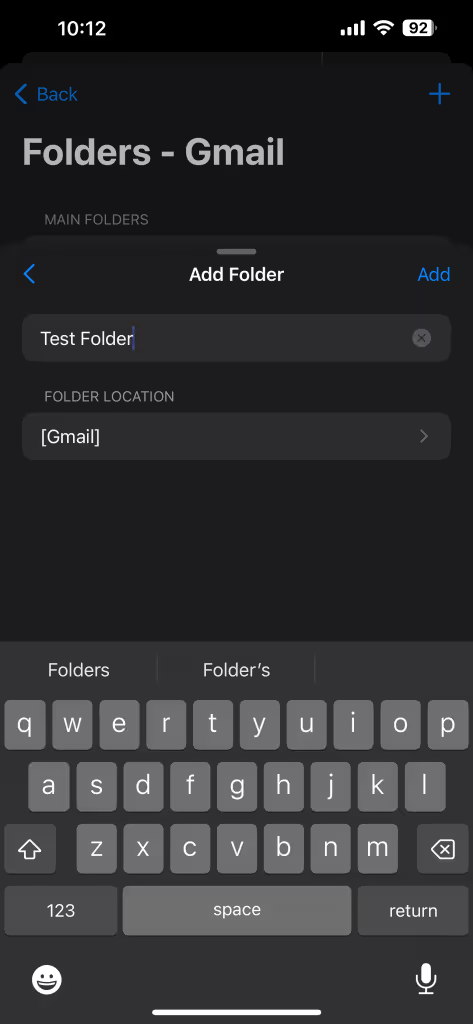
1. Open Canary Mail > Settings > Account > Select the account > Folders.
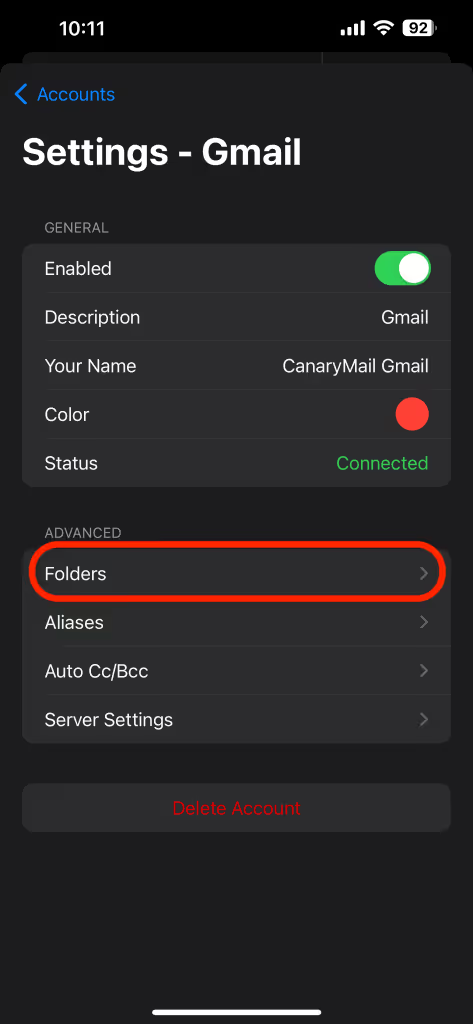
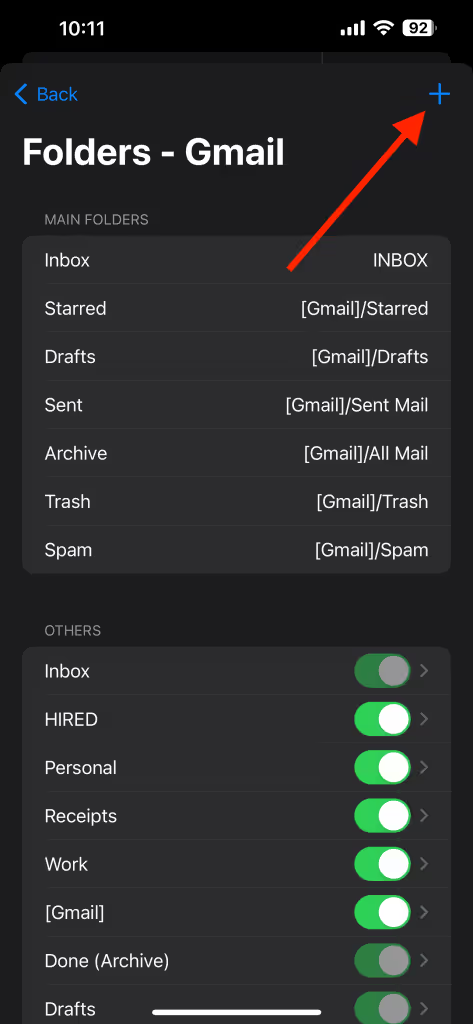
2. Tap on the '+' button at the top right corner.
3. Enter the desired label name.
4. Choose the appropriate account and/or nest label (if any).
5. Tap on “Add” to save the new label.
Adding Labels
To add a new label to an email:
1. Open an email.
2. Tap on more icon (3 dots) at the bottom left corner and select "Labels" from the context menu.
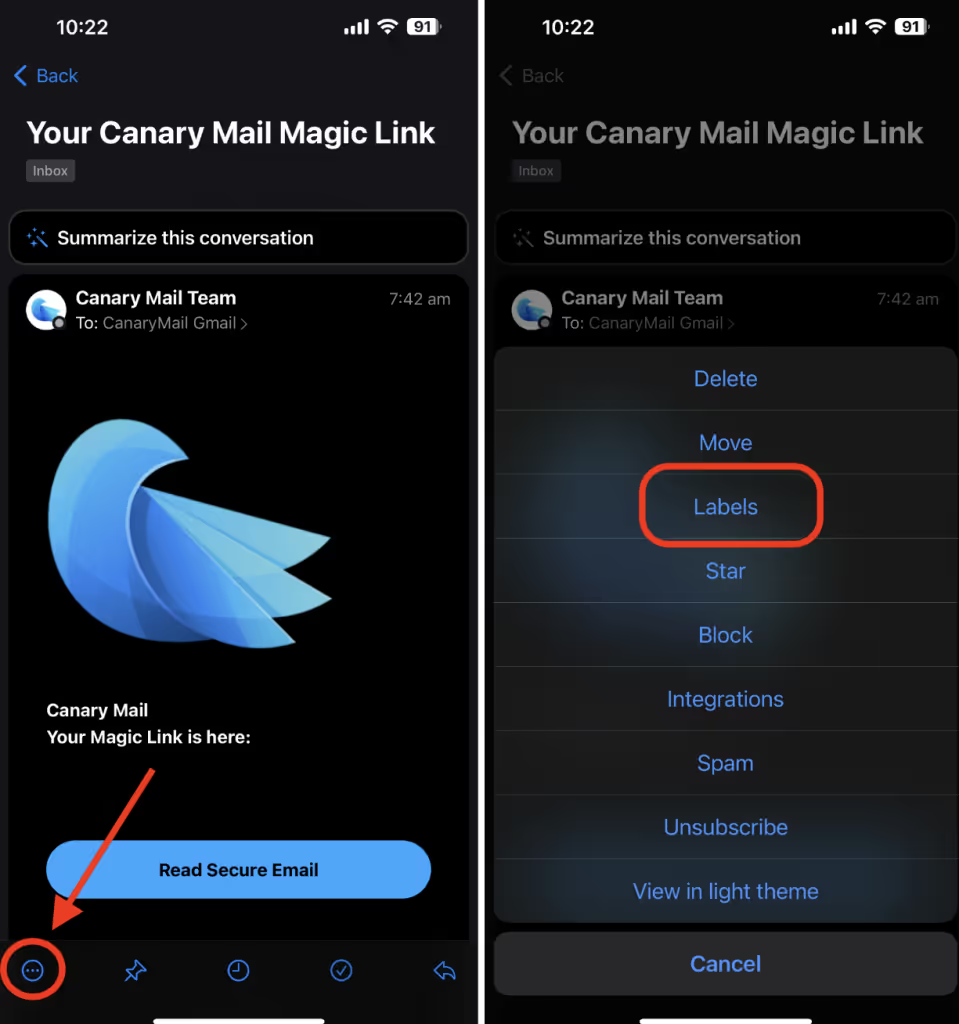
3. Choose one or more labels from the list.
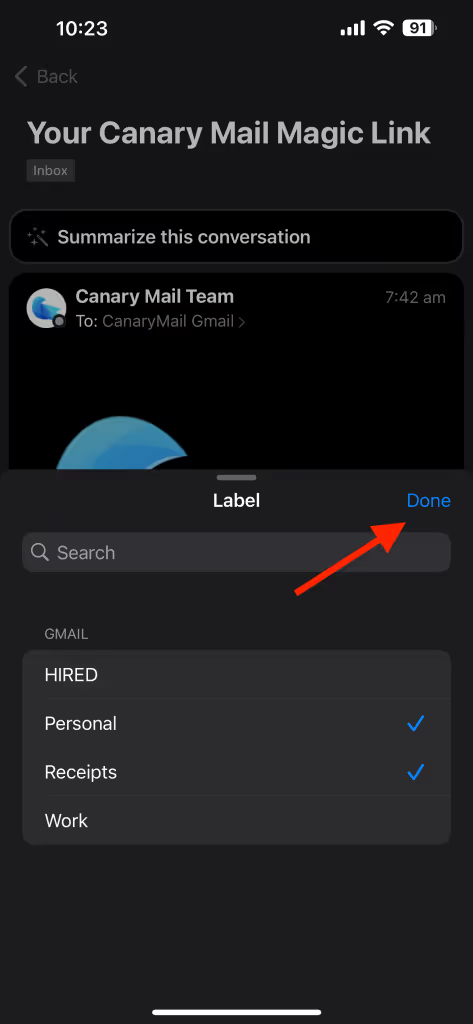
4. Tap done and the selected labels will be added to the email.
You can add multiple labels to a single email, which is especially handy for precise organization.
Removing Labels
To remove a label from an email:
1. Open the email.
2. Tap on the label's name and deselect one or more labels from the list.
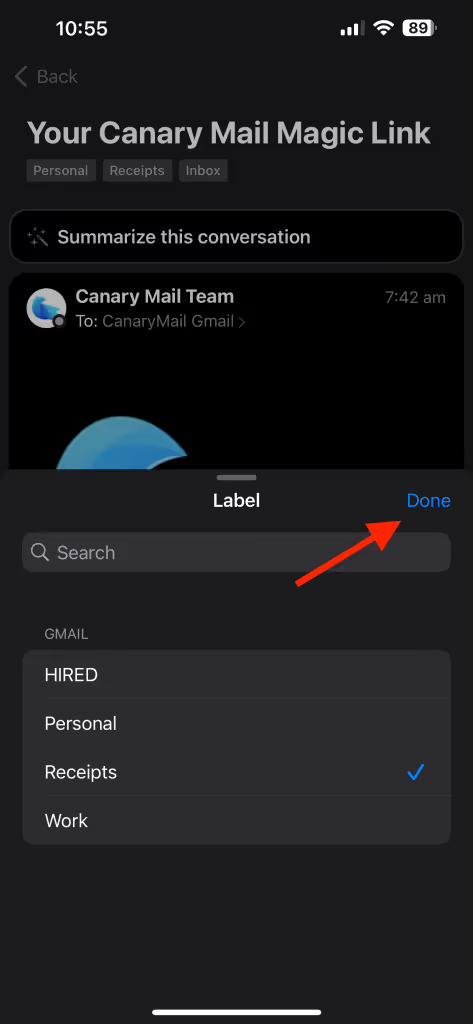
3. The label/s will be removed from the email.
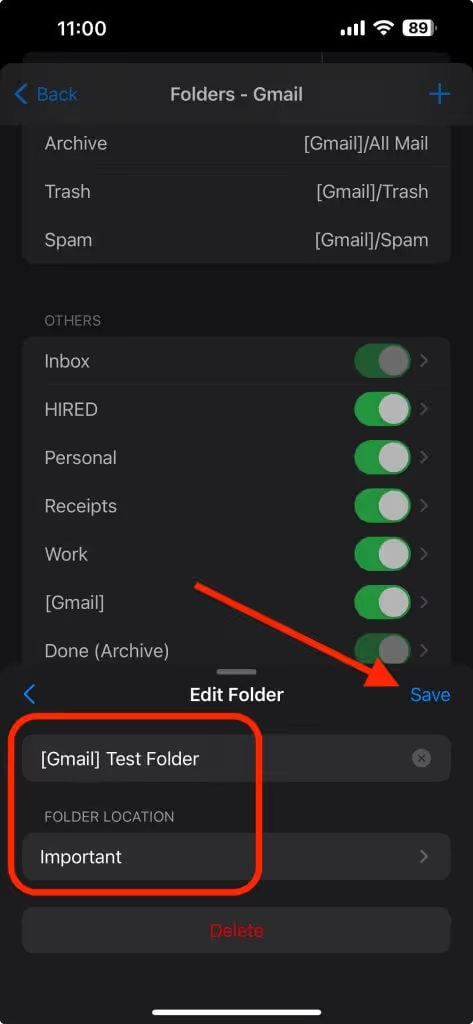
Editing Labels
Should you need to rename a label in Canary Mail:
1. Open Canary Mail > Settings > Account > Select the account > Folders.
2. Choose the correct label you wish to edit.
3. Modify the name and the parent label as desired.
4. Click "Save" to confirm and save the changes.
Deleting Labels
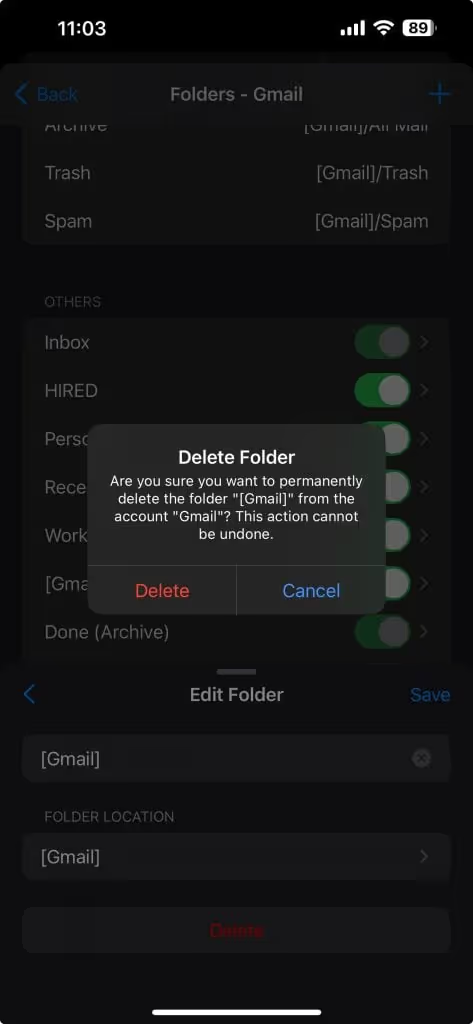
To delete a label from the sidebar in Canary Mail:
1. Open Canary Mail > Settings > Account > Select the account > Folders.
2. Choose the correct label you wish to delete.
3. Confirm by tapping on "Delete."
This way, you can easily manage Gmail labels in Canary Mail, keeping your inbox organized just the way you like it!
Note: Labels are specific to Gmail. If you're using a different email account in Canary Mail, you can organize your emails using folders instead.