- To compose an email on iOS, tap the Compose icon.
- In the To field, start typing the recipient’s name or email address and select the suggestion from Canary. You can add multiple recipients here.
- Check the From field to ensure it’s the correct email address. If you want to send from a different account, tap your email address and choose another one.
- To add Cc or Bcc recipients, tap the down arrow on the right side of the To field.
- Fill in the Subject line and type your message below.
- If you have email signatures enabled, your signature will appear at the bottom. For more details on signatures in Canary, check out this article.
- When you're ready, tap the Send icon.
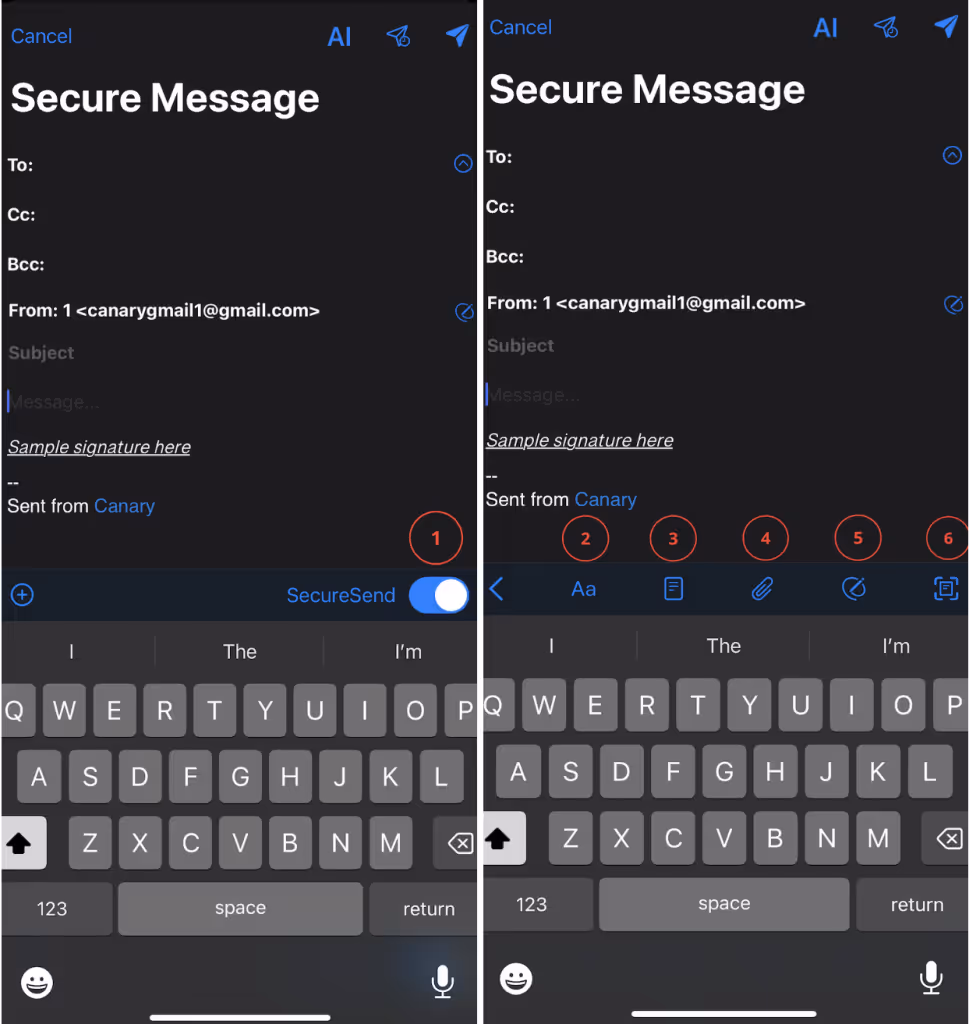
When sending an email, you have some additional options to choose from:
- Encryption: Enable SecureSend to encrypt your email. Check out this link for more details on how it works.
- Formatting: Use the formatting option to style your message. For more on styling text in Canary, visit this link.
- Templates: Tap the Template symbol to add a template to your email. Learn how to use Templates in Canary here.
- Attachments: Attach PDFs, photos, documents, and more using the attach symbol. Find out more about attaching files in Canary here.
- Handwritten Message: Add a handwritten text or signature directly into your email. Use either a pen or your finger to create your handwritten message.
- Autofill Email Address: Scan your business card to autofill the email address on the card.
If you close the email composer before sending, Canary will ask if you want to save a draft. You can find your saved drafts in the Drafts folder on the sidebar.