Step 1: Compose a new mail as usual.
Step 2: Click the “Send Later” arrow button

at the top right corner of the screen.
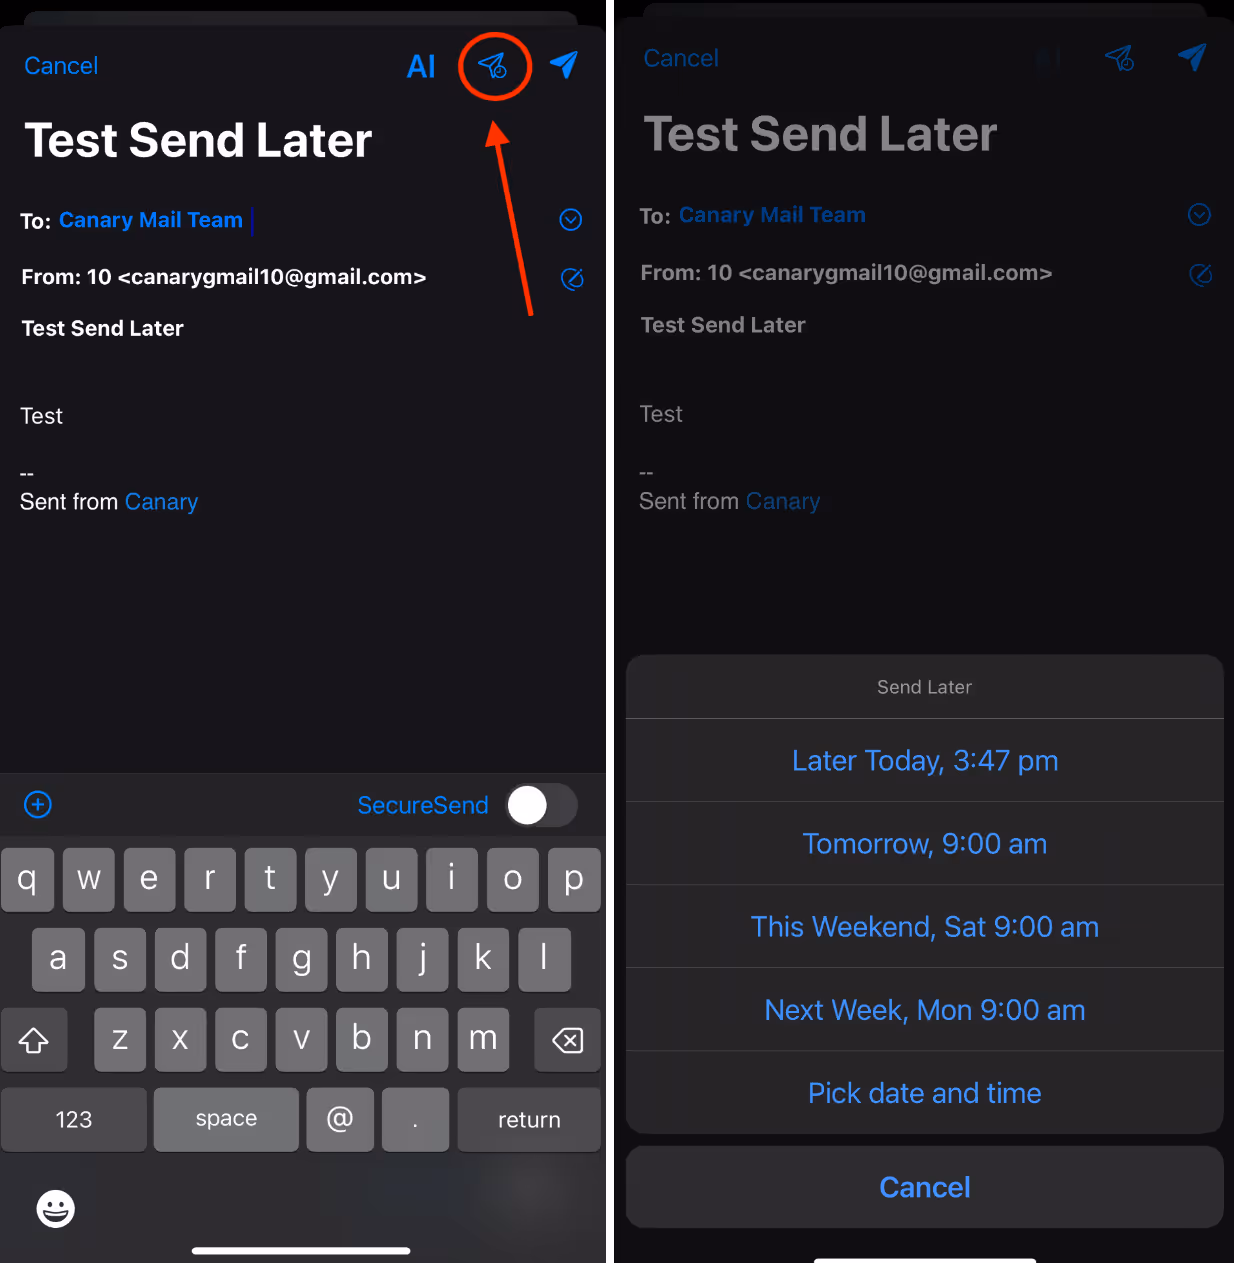
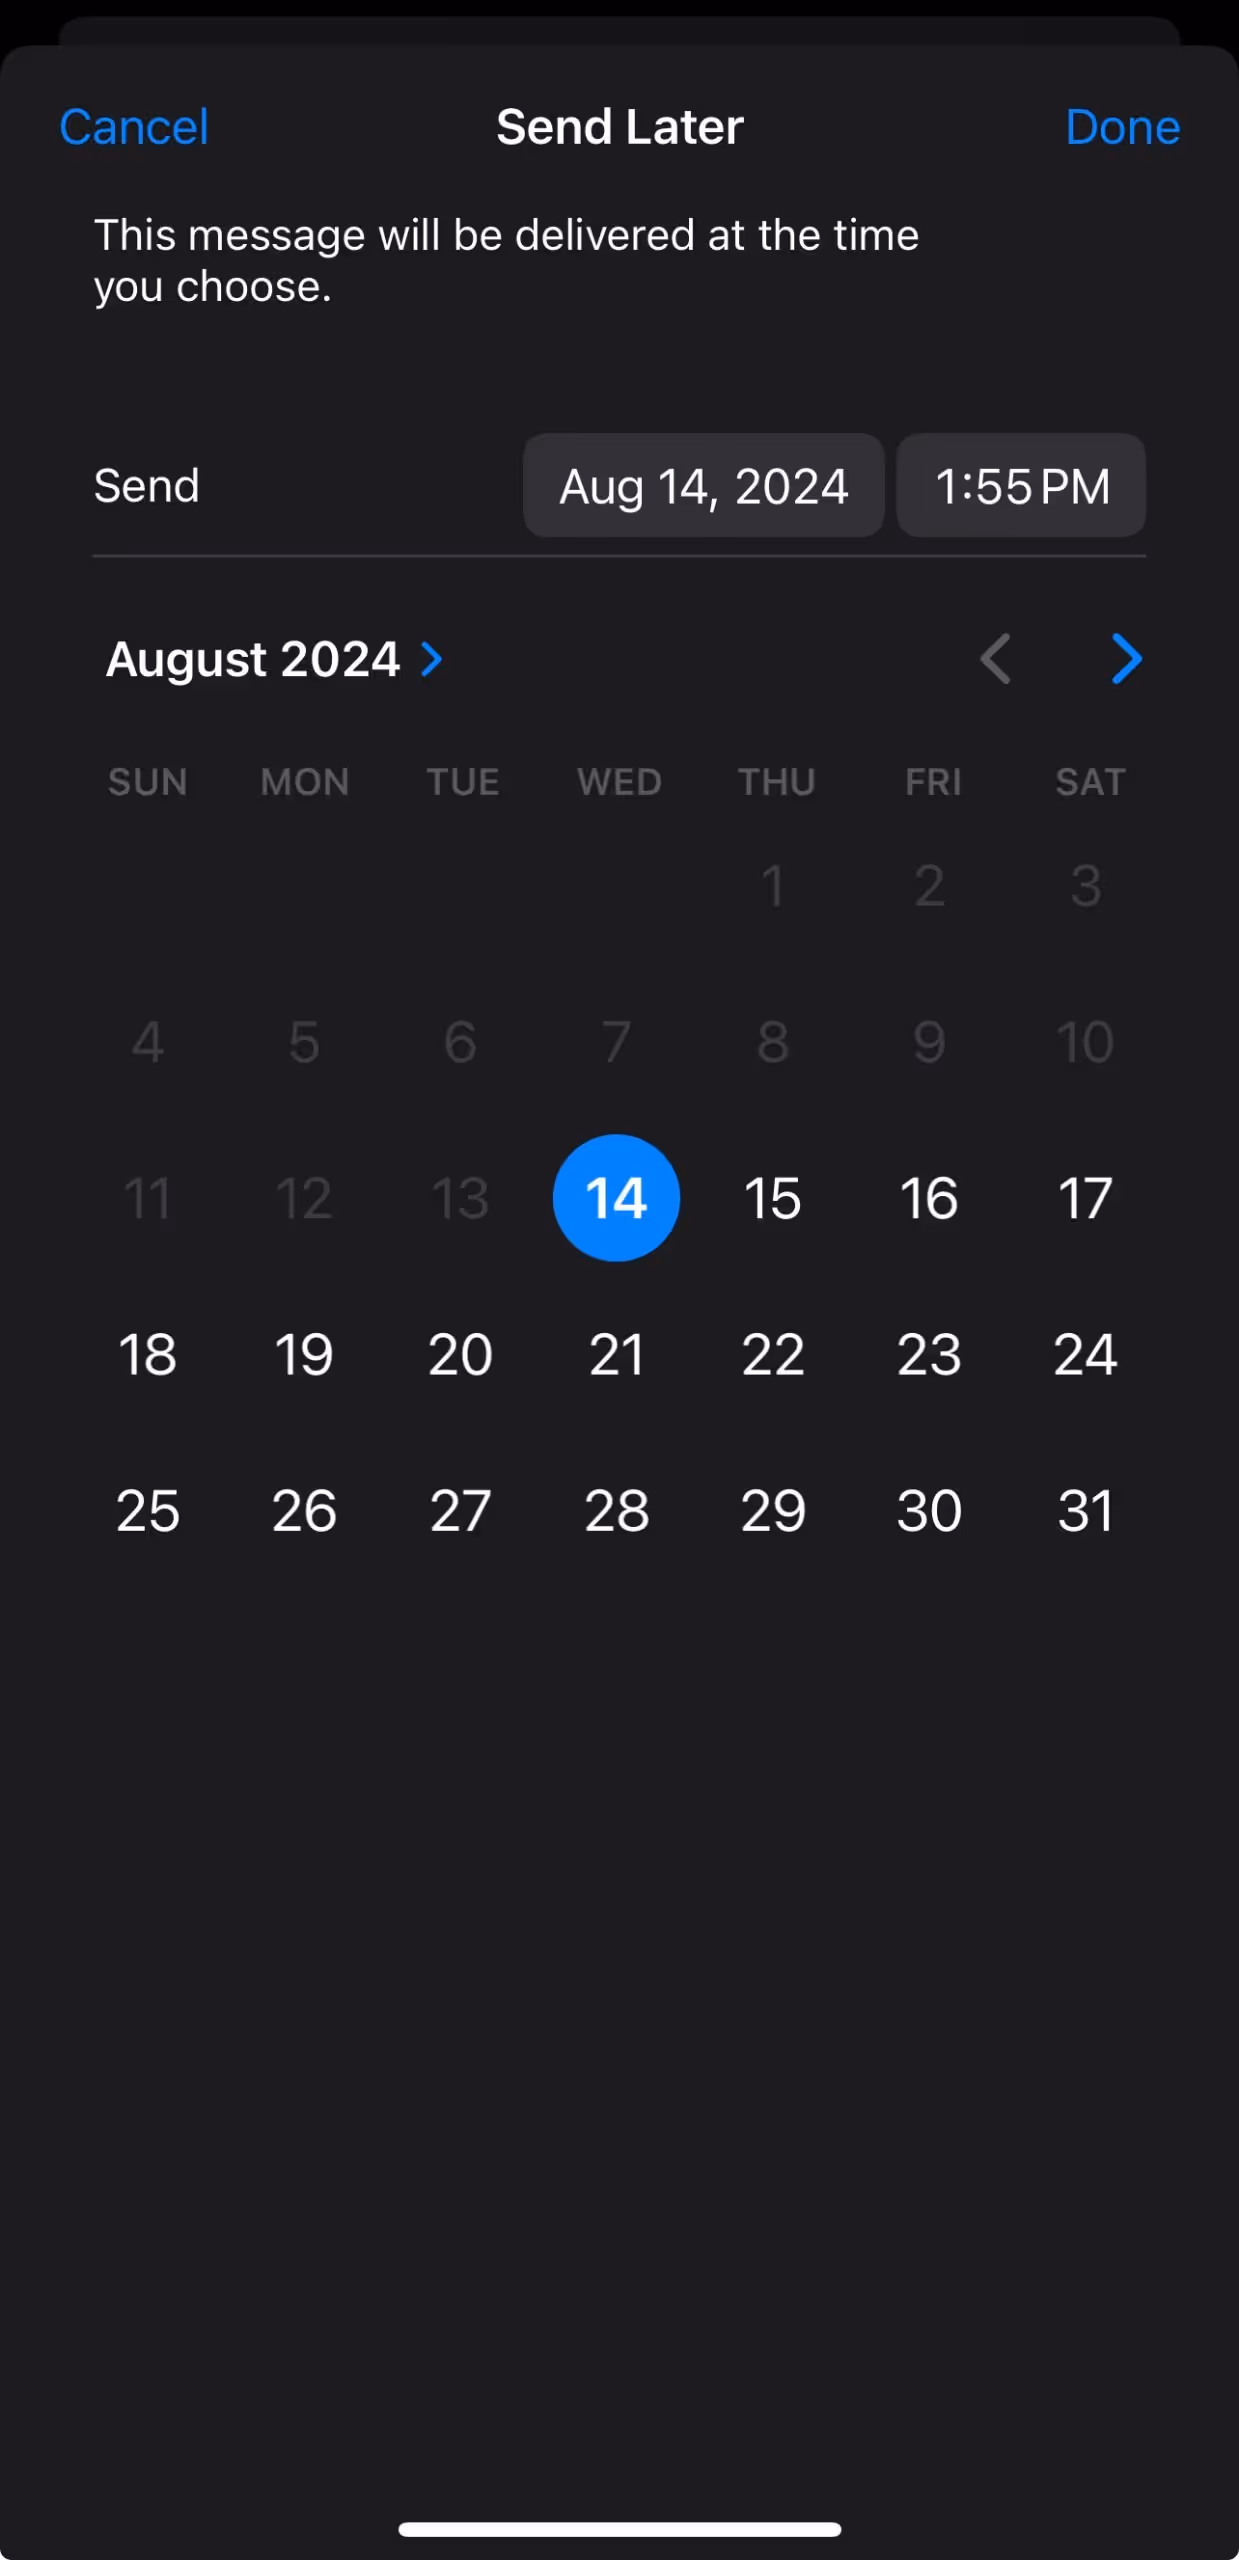
Step 3: Select from predefined timestamps or set a custom date & time for your mail by clicking on “Pick date and time”.
Step 4: Click "Done" to confirm the date and time.
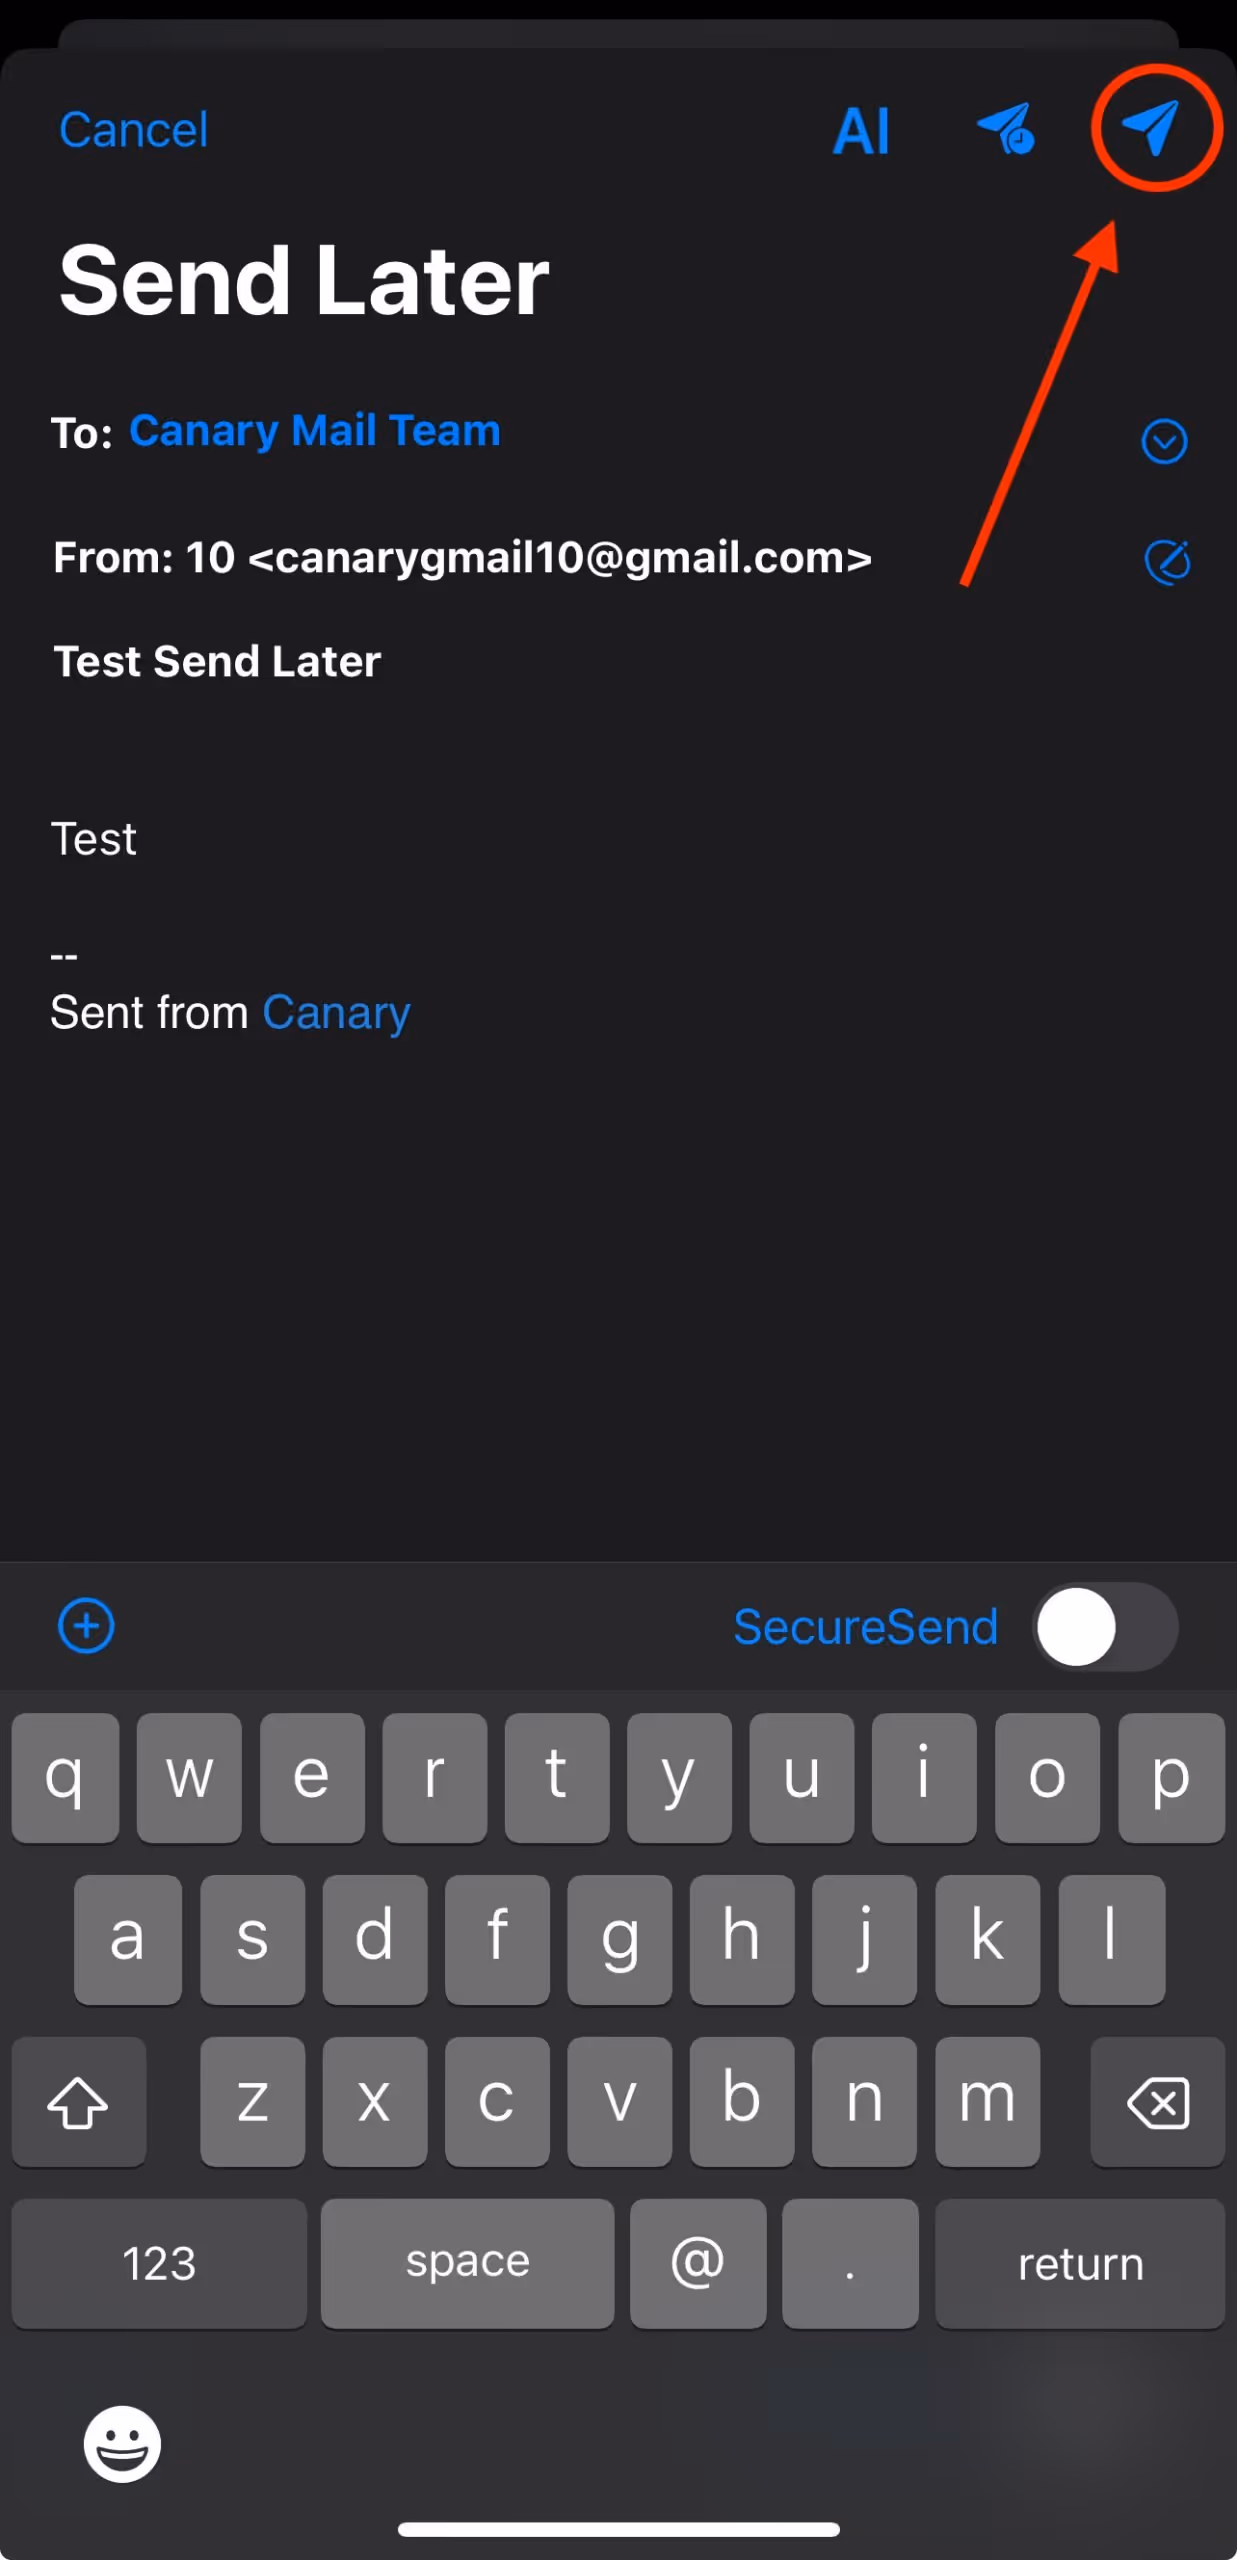
Step 5: The “Send Later” button will be marked blue to indicate that the mail is scheduled for later. Now, click the “Send” button on the top right corner of your window to finish scheduling the mail.
The mail will now appear in your "Send Later" folder and will be sent automatically at the date and time you specified. After the mail has been sent, it will automatically move to your “Sent” folder.
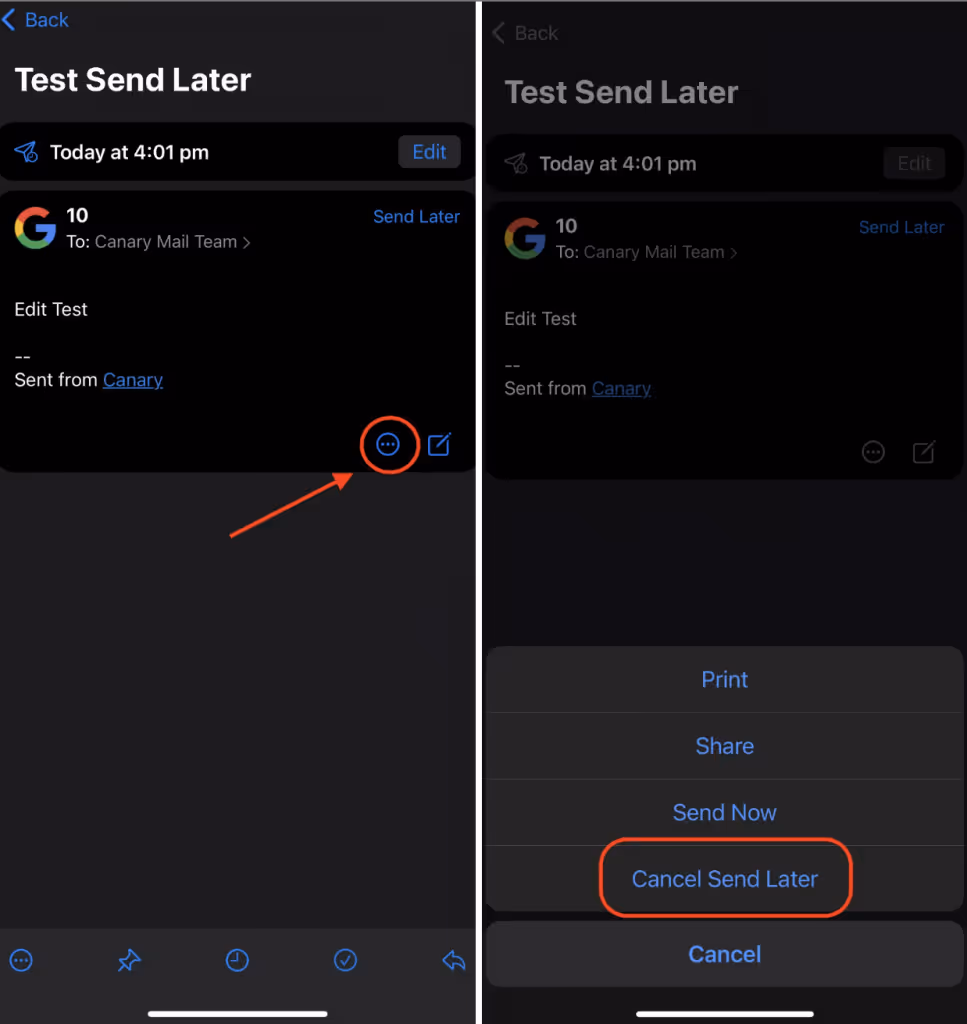
You can edit or cancel a scheduled mail at any time before it is sent:
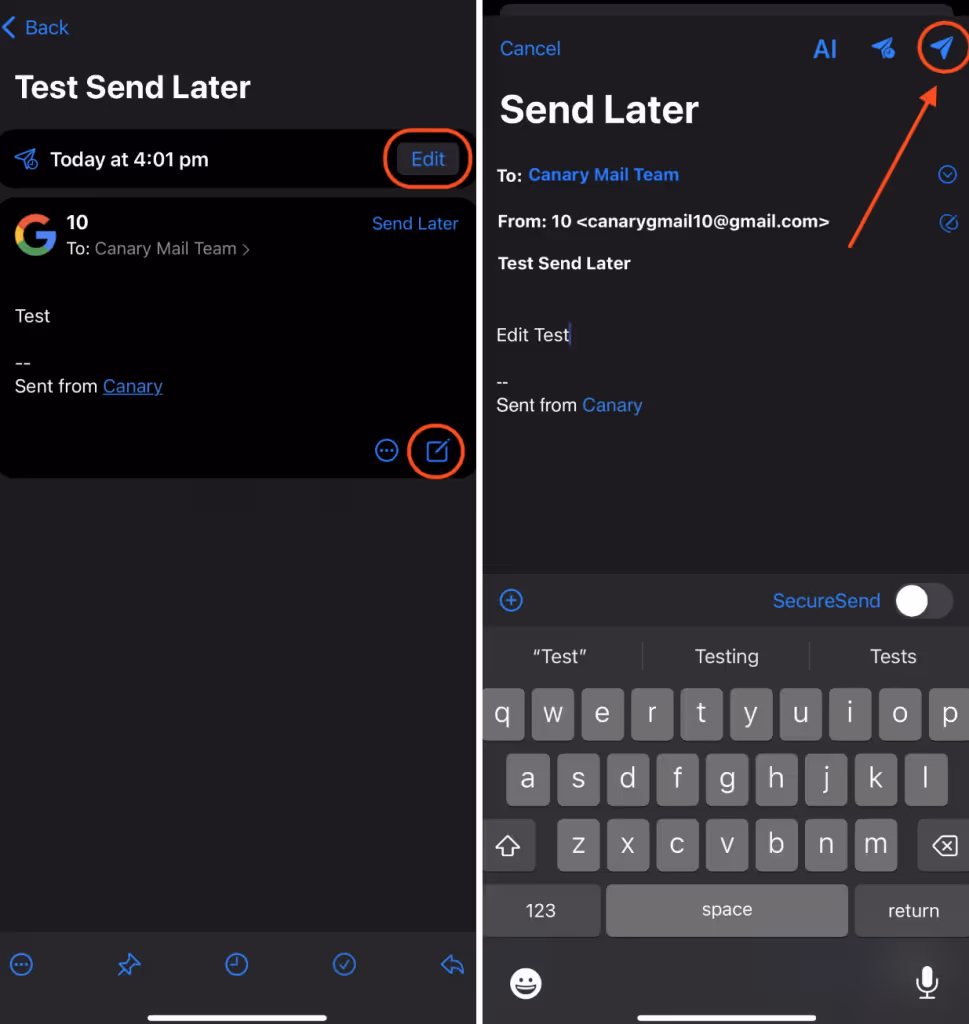
Step 1: Open the "Send Later" folder.
Step 2: Tap the mail you want to edit or cancel.
Step 3: To edit the content of the mail, click the edit or the compose button. Here you can edit the content and/or the scheduled time of the mail. After making the changes, click the “Send” button at the top right of the screen to reschedule your mail.
Step 4: To cancel the scheduled mail, tap the “options” button at the bottom of the mail and click “Cancel Schedule”.
Tips and Tricks
- Once the email is scheduled, you don’t need to keep your device connected to the internet. The email will be sent as per the schedule nevertheless.
- Make sure to check time zones when scheduling for recipients in different parts of the globe.
- If you decide to cancel or reschedule a mail, visit the "Scheduled" folder and edit your mail as required.
Send Later is a handy feature designed to make your email management easier and more flexible. Try it out and make your email communication smoother than ever before!